Location One - M10070 
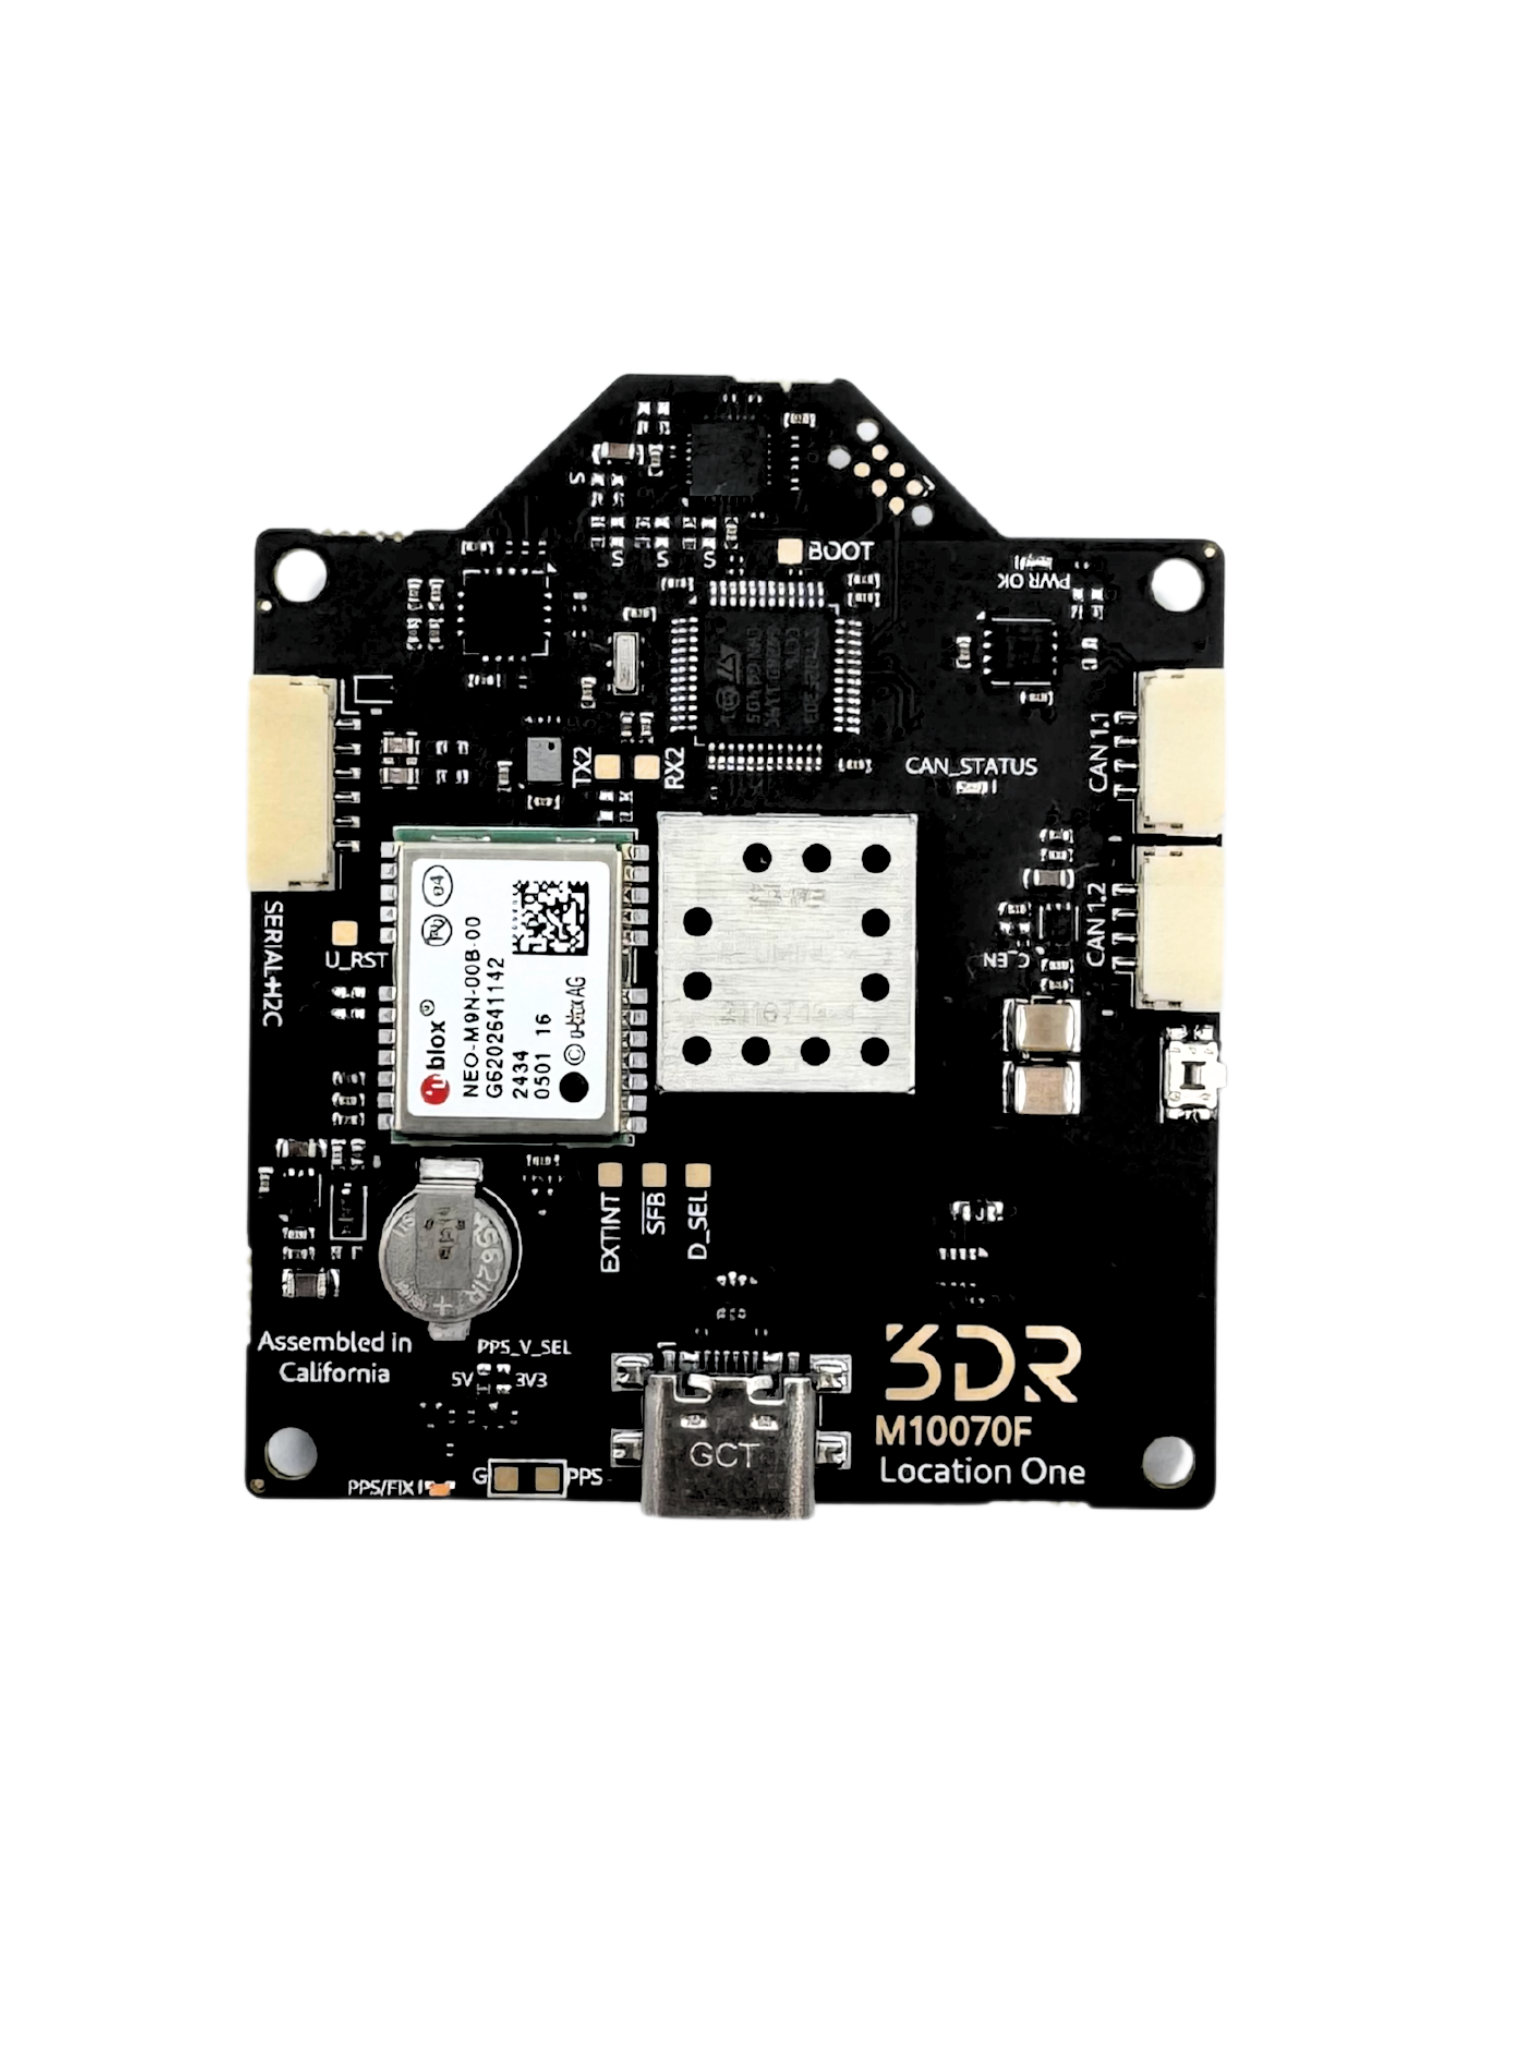
The 3DR Location One is a multi-constellation GNSS powered by the u-blox M9N module and the advanced RM3100 compass.
Compared to old generation GNSS+Compass modules, this board incorporates a robust Controller Area Network [CAN] bus based on the ArduPilot AP_Periph CAN peripheral firmware.
This CAN port allows us to transmit all sensor data with just two wires, on a single bus with high noise tolerance. It has a RGB Status LED and “Arm” safety button. Designed for all UAVCAN compatible platforms.
Location One is not just a u-blox chip populated on a purple reference GNSS board design. Patch antennas won’t work by themselves, they require a proper ground plane to achieve maximum performance and assure good reception at any angle. With the lack of a proper antenna, the GNSS module will not achieve peak performance (or work at all), as would happen with any RF system. The Location One ground plane and RF circuitry might look the same as other options, but we work very hard to give you extra performance.
3D View
Specifications
| Specifications | 3DR Location One w/ Barometer & Compass |
|---|---|
| Ground Plane | 50mm x 50mm |
| Constellations | USA (GPS), Russia(GLONASS), Europe (Galileo) & China (BeiDou). |
| Compatibility* *See full compatibility chart for supported flighstack versions | RM-3100 supports: both PX4 and Ardupilot |
| RTK ready | No |
| USB Port | Yes (Type C) |
| CAN ready | Yes |
| Minimum and Maximum Operating Temperature | -20 ~ 80 °C |
| LED | Yes |
| Dimensions | 50mm x 50mm x 7mm |
| Weight | 20.26 grams (.71 oz) |
| Mounting Holes | 3.2mm |
| Case | Optional |
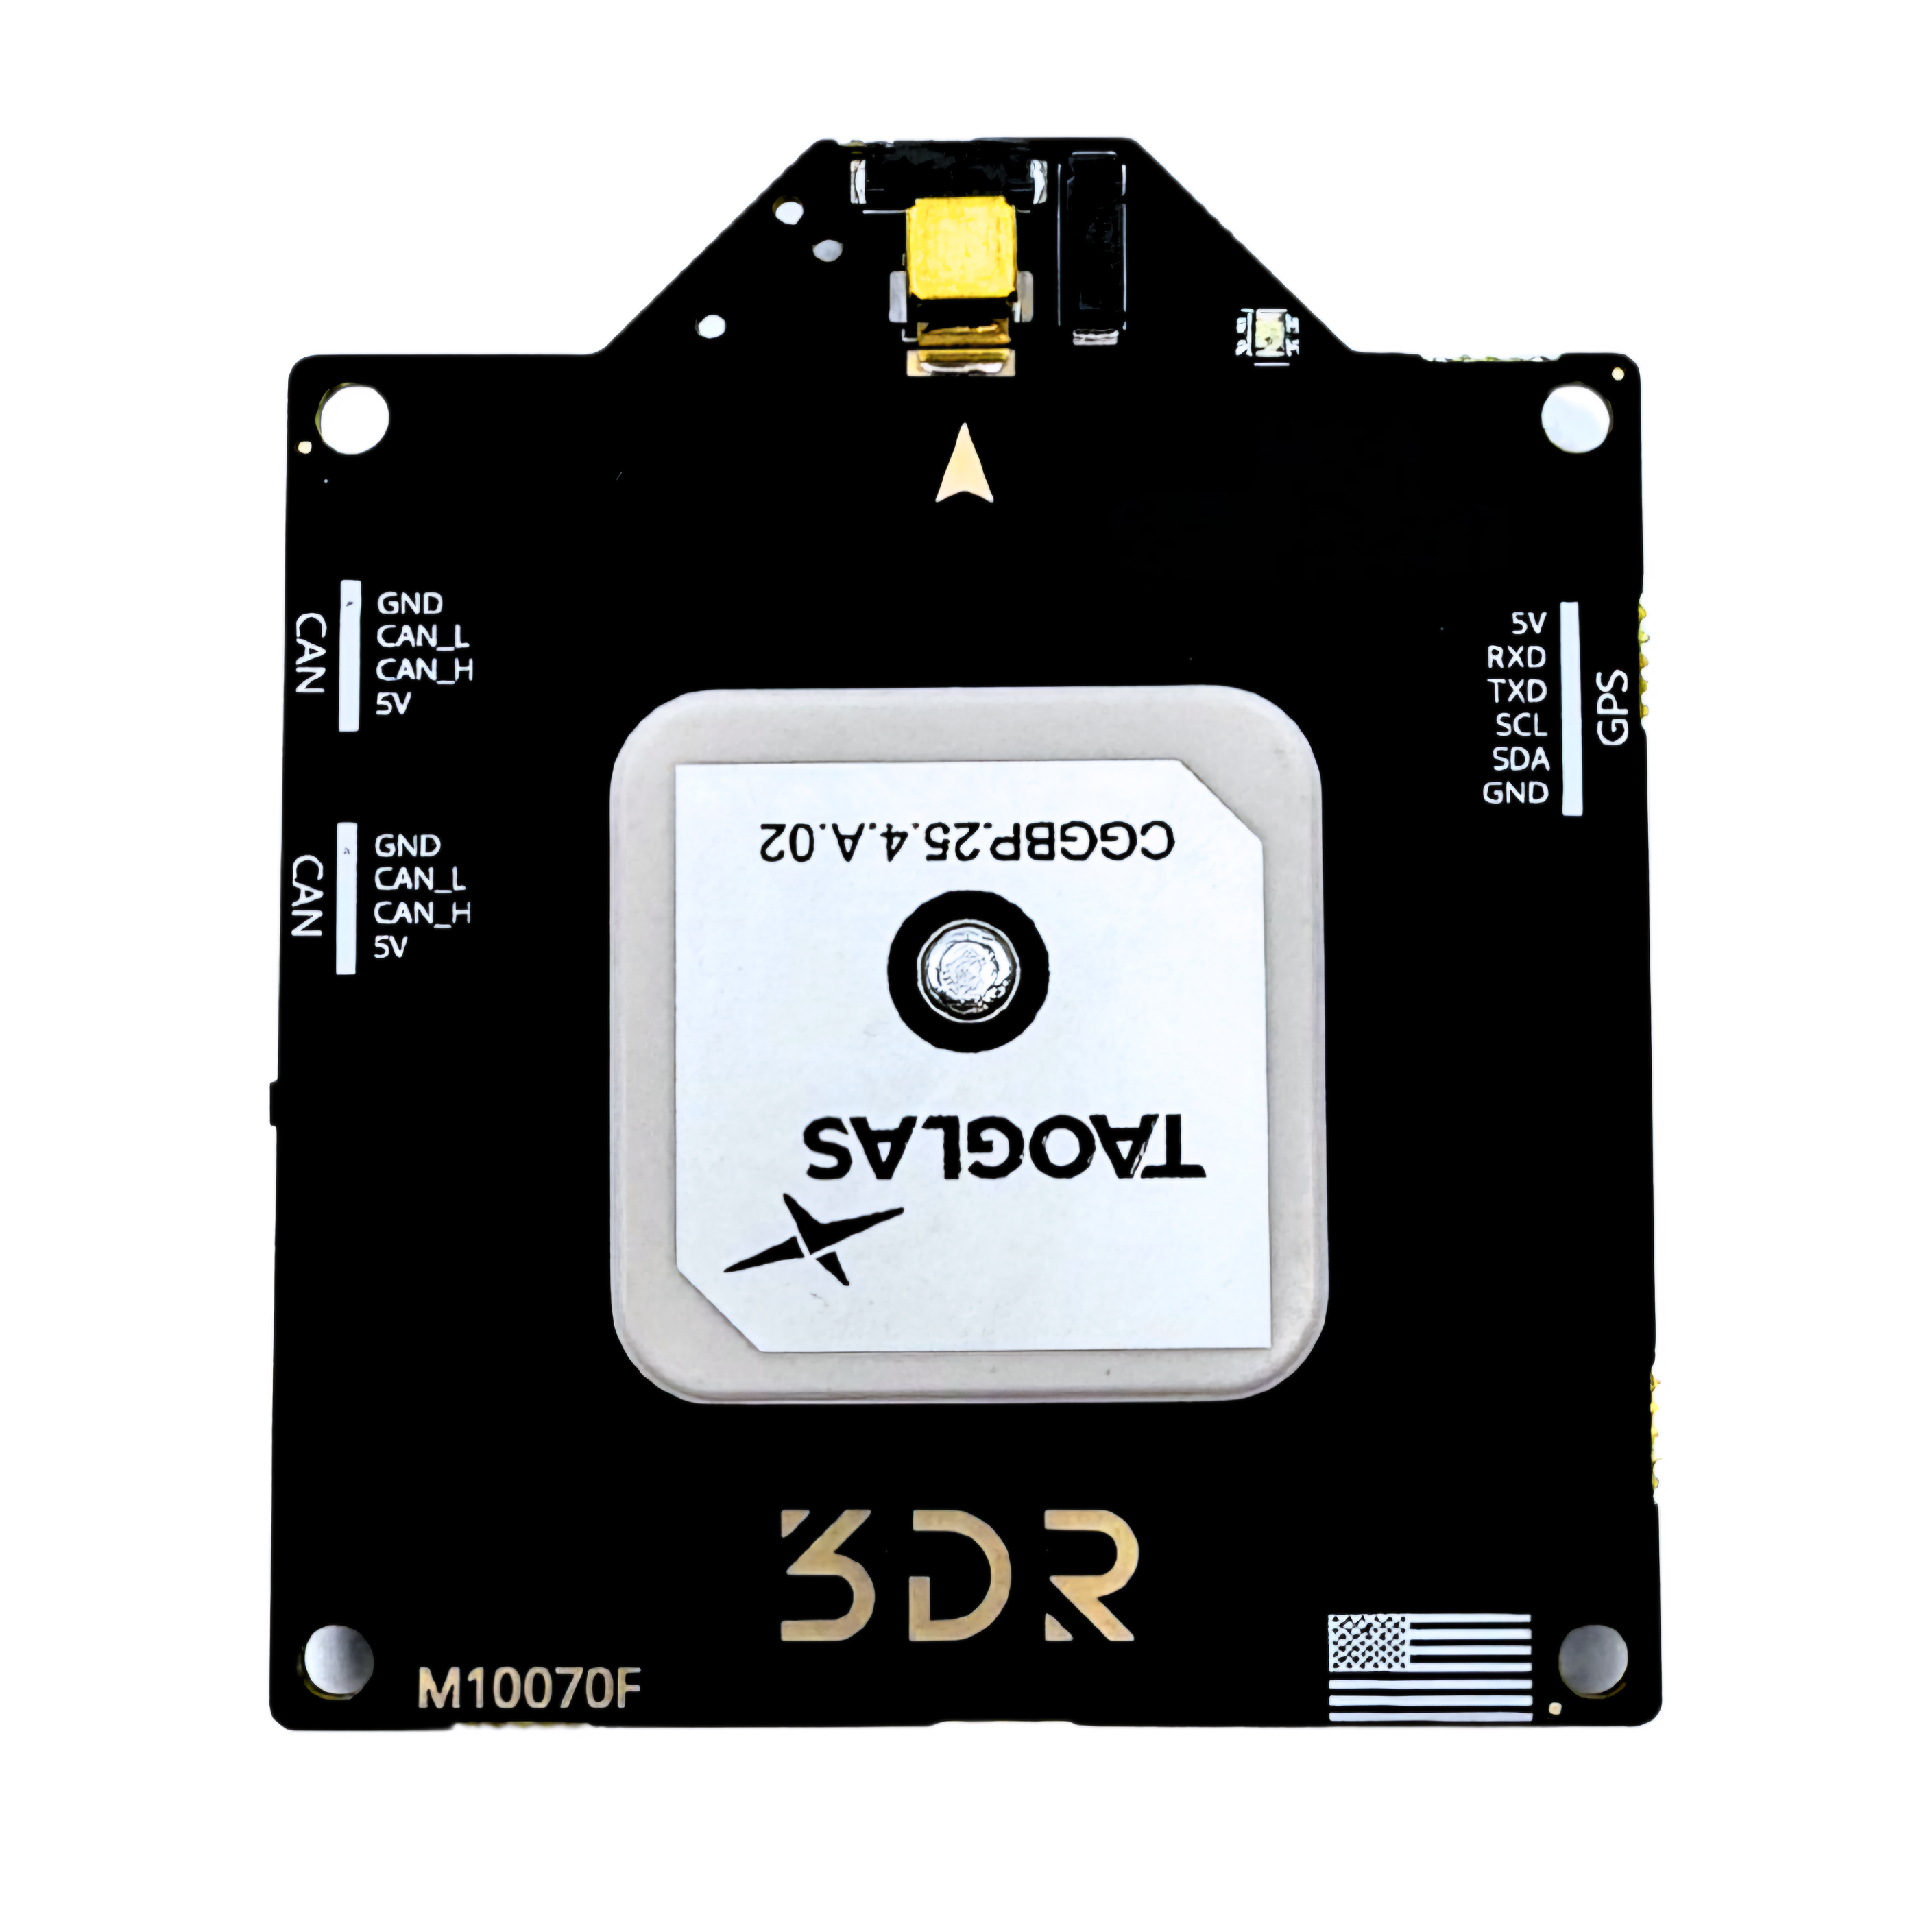
| Connectors | -2x 4-Pin JST-GH (CAN) -1x 4-Pin JST-GH (I2C) -1x 6-Pin JST-GH (u-Blox UART) |
| Includes | -1x 3DR Location One -2x 6-pin JST-GH cables -1x USB -C cable |
| Typical Platforms | -Multirotor -Rover -Fixed-Wing -Boats -VTOL -Automatic Tractors -Others |
| Other Features | The best compass system available at the moment for lightweight platforms RGB LED driver (IS31FL3195) PPS pad for easy access *On-board safety switch |
Features
-
Dual 3.3V regulators. One dedicated to the microcontroller and not critical sensors or peripherals, and one 3.3V just dedicated to the GPS module, as close as possible to reduce noise.
-
TVS protection added on all input voltages. Now your board is more robust and reliable.
-
Backup battery circuit revised, now offers up to 6 weeks for warm-start of the GNSS Module, battery retains full capacity after several charging cycles.
-
PPS logic voltage selector added for a mosfet-driven (push-pull) output pad
-
External interrupt, safe boot, D_SEL pads from u-blox chip now exposed
-
Ground separations: the PCB is a multi-layered device, which allows us to separate the grounds from the GPS engine and the “rest” as much as possible, to reduce noise affecting the very weak GNSS signals.
-
We are the first to “bump” the GPS shape and expose the compass coils away from the main PCB area. This has two advantages: the first is that it keeps the GPS ground plane intact, and the second is that it positions the very sensitive magnetic coils away from the internal unit noise with a “clear view” for better performance. Also, notice that the area has almost no copper.
-
We now provide a cover protection for the RM1300's Z-axis coil
-
Extra optional serial port pads from STM32 MCU (TX2, RX2) added
-
STM32 Boot0 pad added
-
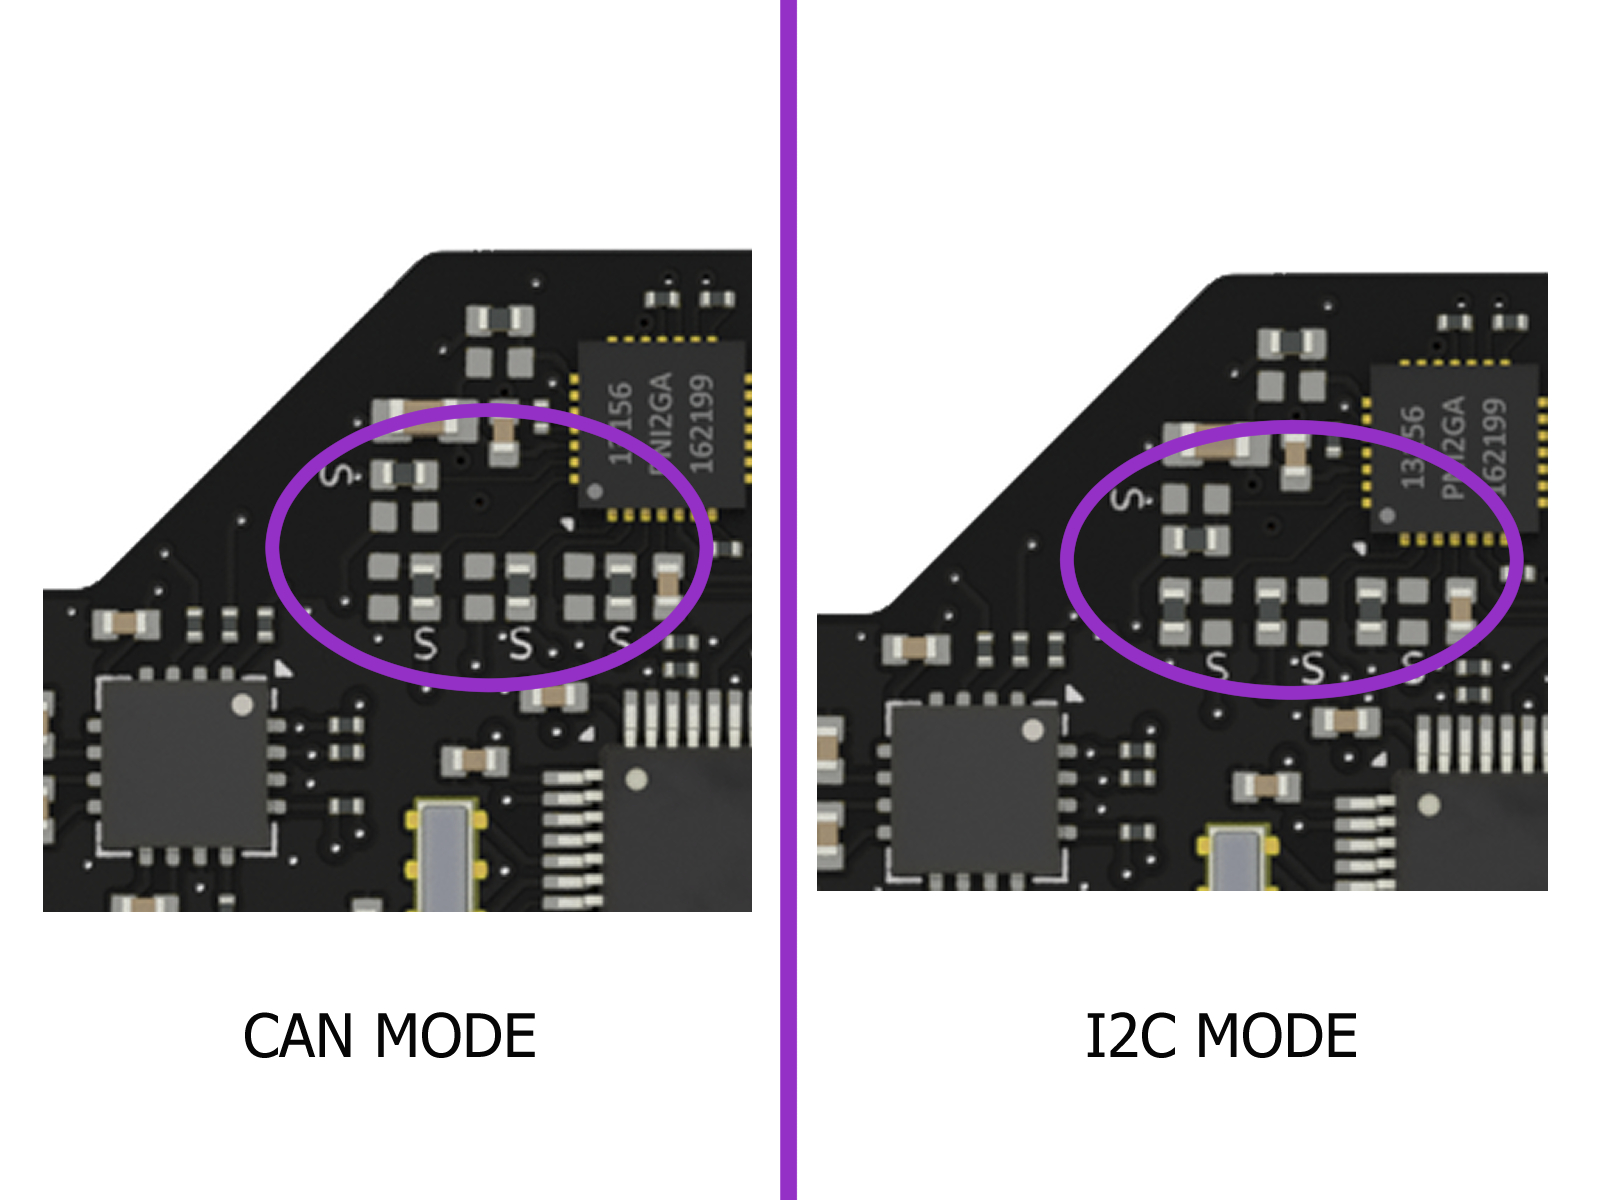
Selectable I2C/CAN standalone mode
- CAN (Primary): All sensors are transmitted through DroneCAN
-
I2C (Secondary): All sensors except by GNSS are transmitted through I2C, GNSS remains on CAN
-
Changed Driver LED from NCP5623 to IS31FL3195
Changelog
The changelog for this product can be found at this link.
Quickstart guide
Selection for CAN/I2C for onboard sensors aside the GNSS module
The Location One comes configured to transmit all the data through a CAN interface by default. If for some reason you need to expose the sensors to use an I2C interface, then you'll have to carefully switch all resistors from the S Position (labeled) to the pad on the side as shown on the picture below:
Ardupilot Parameters
On the latest version of Mission Planner, set the following parameters:
| PARAM | VALUE |
|---|---|
CAN_P1_DRIVER | 1 |
CAN_P2_DRIVER | 0 |
GPS_TYPE | 9 UAVCAN |
GPS_TYPE2 | 9 UAVCAN (Optional) |
Warning
Make sure the DroneCAN compass driver is not disabled (UAVCAN should be unchecked).
If your flight controller has more than 3 internal compasses, you should disable the least important one:
| PARAM | VALUE |
|---|---|
COMPASS_TYPEMASK | ^!UAVCAN (Unchecked) |
Connect your 3DR Location One to your flight controller via CAN and Reboot.
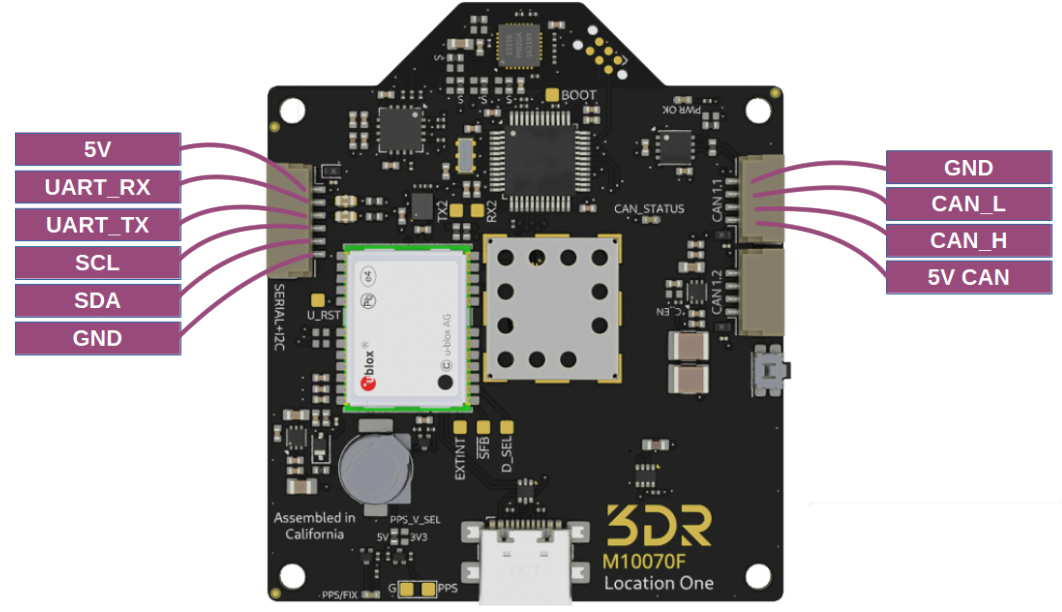
Wiring diagram
Other parameters
Enable RGB
| PARAM | VALUE |
|---|---|
NTF_LED_TYPE | UAVCAN (Only if you want the RGB enabled, no longer applicable for revision F) |
Enable I²C Airspeed
To enable an I²C airspeed, first go to your full parameter list via Mission Planner and set:
| PARAM | VALUE |
|---|---|
ARSPD_TYPE | 8 - UAVCAN |
ARSPD_USE | 1 |
ARSPD_BUS | 0 |
Then access your 3DR Location One CAN parameters by clicking on:
- Mission Planner -> Initial Setup -> Optional Hardware -> UAVCAN -> SLCan Mode CAN1 (or 2) -> Parameters
Inside the CAN Parameters list, change the following:
| PARAM | VALUE |
|---|---|
ARSPD_TYPE | 1 |
Write the parameters mentioned and reboot.
Warranty and Warnings
Tip
The 3DR Location One is a powerful yet delicate device. Special care should be taken when handling it.
Handle with care and avoid touching the metal cap antenna, your static discharge might damage the internal LNA. Do not cover it with tape or another insulator if you are not sure of its properties. This might change the antenna tuning resulting in lower performance.
Also, the 3 magnetic coils mounted on the top-front of the units are delicate. They have very little solder paste volume to reduce tilt variance. Any strong impacts will definitely separate them from the unit. From revision F onwards, we added cover protection for them to help you keep this coil intact. If you break one, contact us for assistance.
Downloads
Please contact us if you have any questions or need further assistance.